
Search engines like Google are considering load time to be more and more important when it comes to both search engine optimization and PPC quality scores. File size certainly affects your website’s load time. Image size is a very important factor in determining how well optimised your site is. What this means for you, as a website admin, is that every image used on the website should be properly optimised and uploaded in the smallest possible size. And all this while still looking good! This quick article will guide you through resizing and cropping images using options built into your PC or MAC and without the need for a graphic design degree!
Stock images are quite often sold in a very large size (often exceeding 5000px wide) which results in a very large file size. Generally, no image uploaded to the website should be over 2000px wide or 200kb (unless it has some text and it’s intended to be very large). Usually, we aim to resize an image to the standard banner dimensions of 1920px wide by 500px tall. Instructions are below, but Dmac Media clients can feel free to contact support@dmacmedia.ie if you’re unsure about what image size to resize your images and we’ll be happy to help.
For the purposes of this guide, we will be working with a .jpg file format. If your image is saved in a different format, you can use the free image converting options provided by TinyWow.com.
If your image has a transparent background, it will be a .png file, which is also accepted by our build system. It’s advisable to use .jpg if no transparency is required, as the file size is much smaller.
jump to: Instructions for Windows PC Instructions for Mac
1. Open your image with the Windows Photos App
Usually, it is set as a default photo viewer. If not, you can right click your image file and choose Open with >> Choose another app
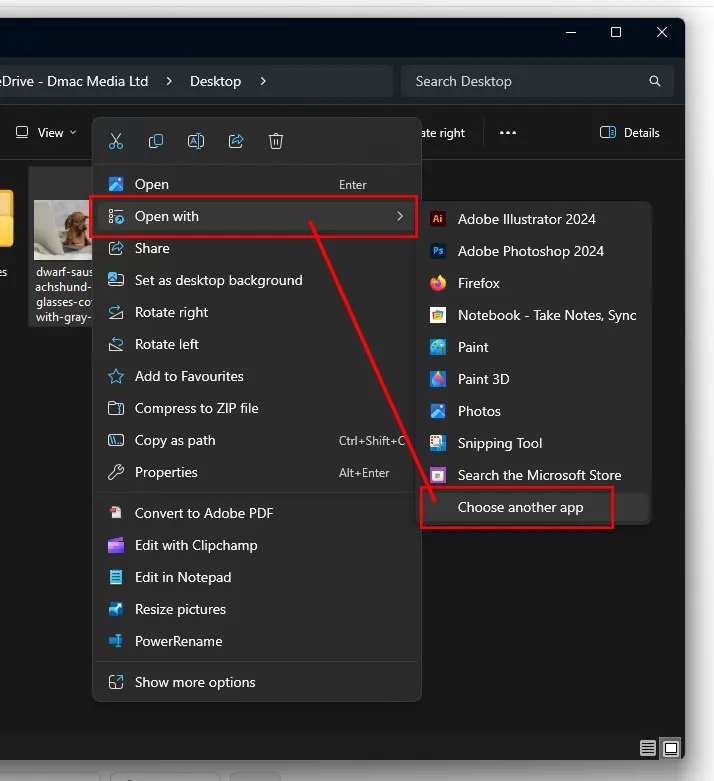
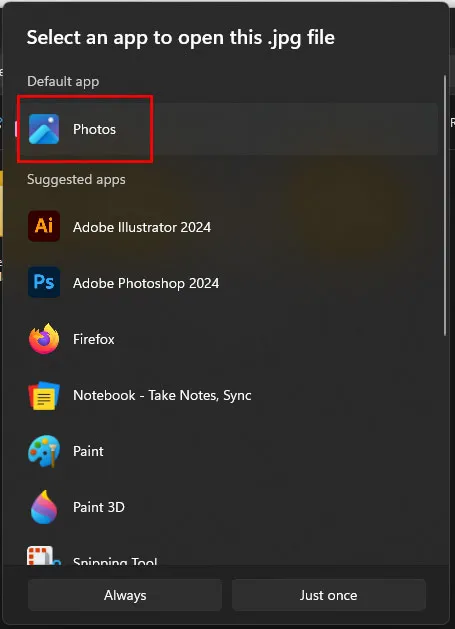
2. Right click your image and choose Resize Image.
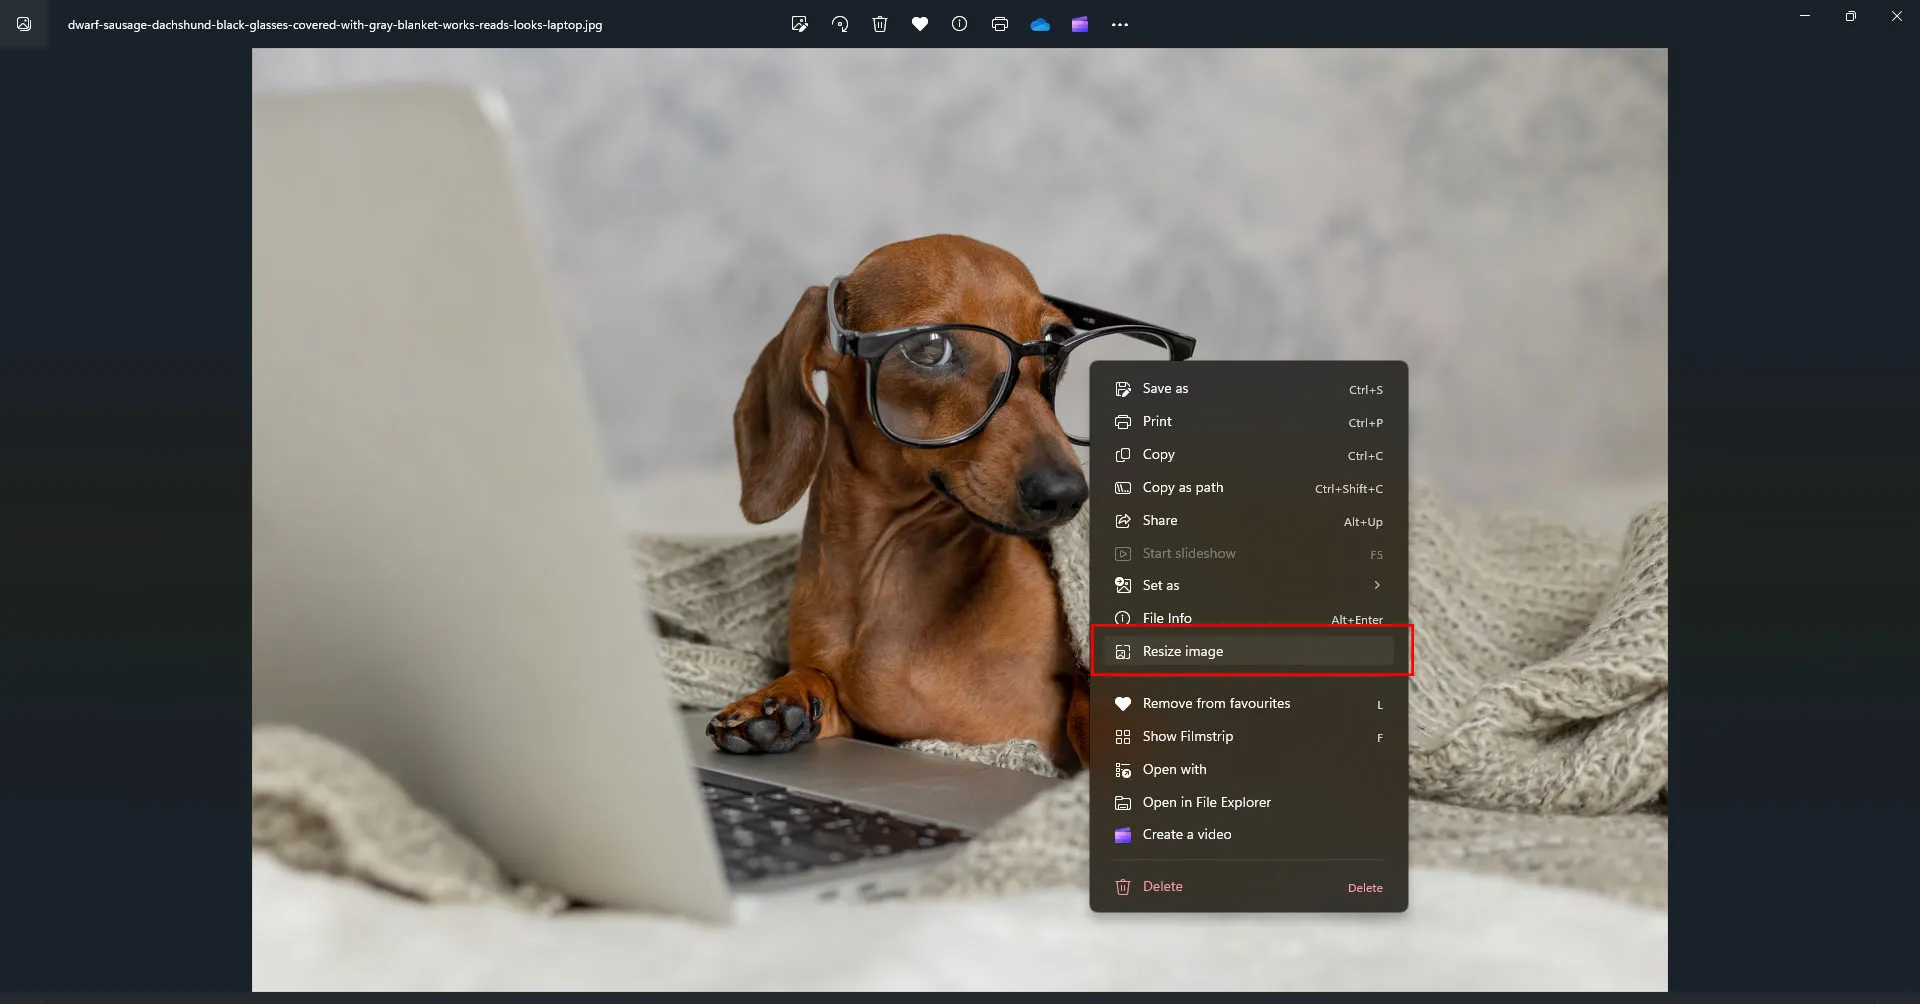
3. Adjust the size of the image. This will depend on the destination of the image. The hero banners are usually the biggest, while product images are usually much smaller.
I’ve set the width to 2000px. The height changes automatically to maintain the image ratio. I will show you how to crop the height in the later steps.
4. You can move the quality slider down to reduce the file size, but make sure your end image is still “good enough” and not pixelated or blurry. You might try this setting a few times until you get it right. Notice how the size of the image is now drastically reduced.
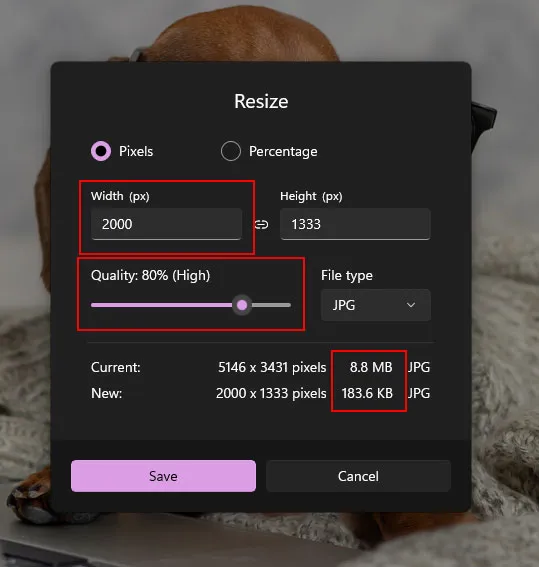
5. Click Save. We have resized our Image successfully.

Similarly, to the steps above, we will now try to crop the image above to reduce it’s height to 650px, but you can set it to any number you need.
1. Open your image with the Windows Photos App
2. Click the Edit Image icon or CTRL + E.

3. By default, you’ll be presented with the first option called Crop.
4. Drag handles or use arrow keys to crop the image. As you start reducing the size, you will see a preview of the exact size in pixels.
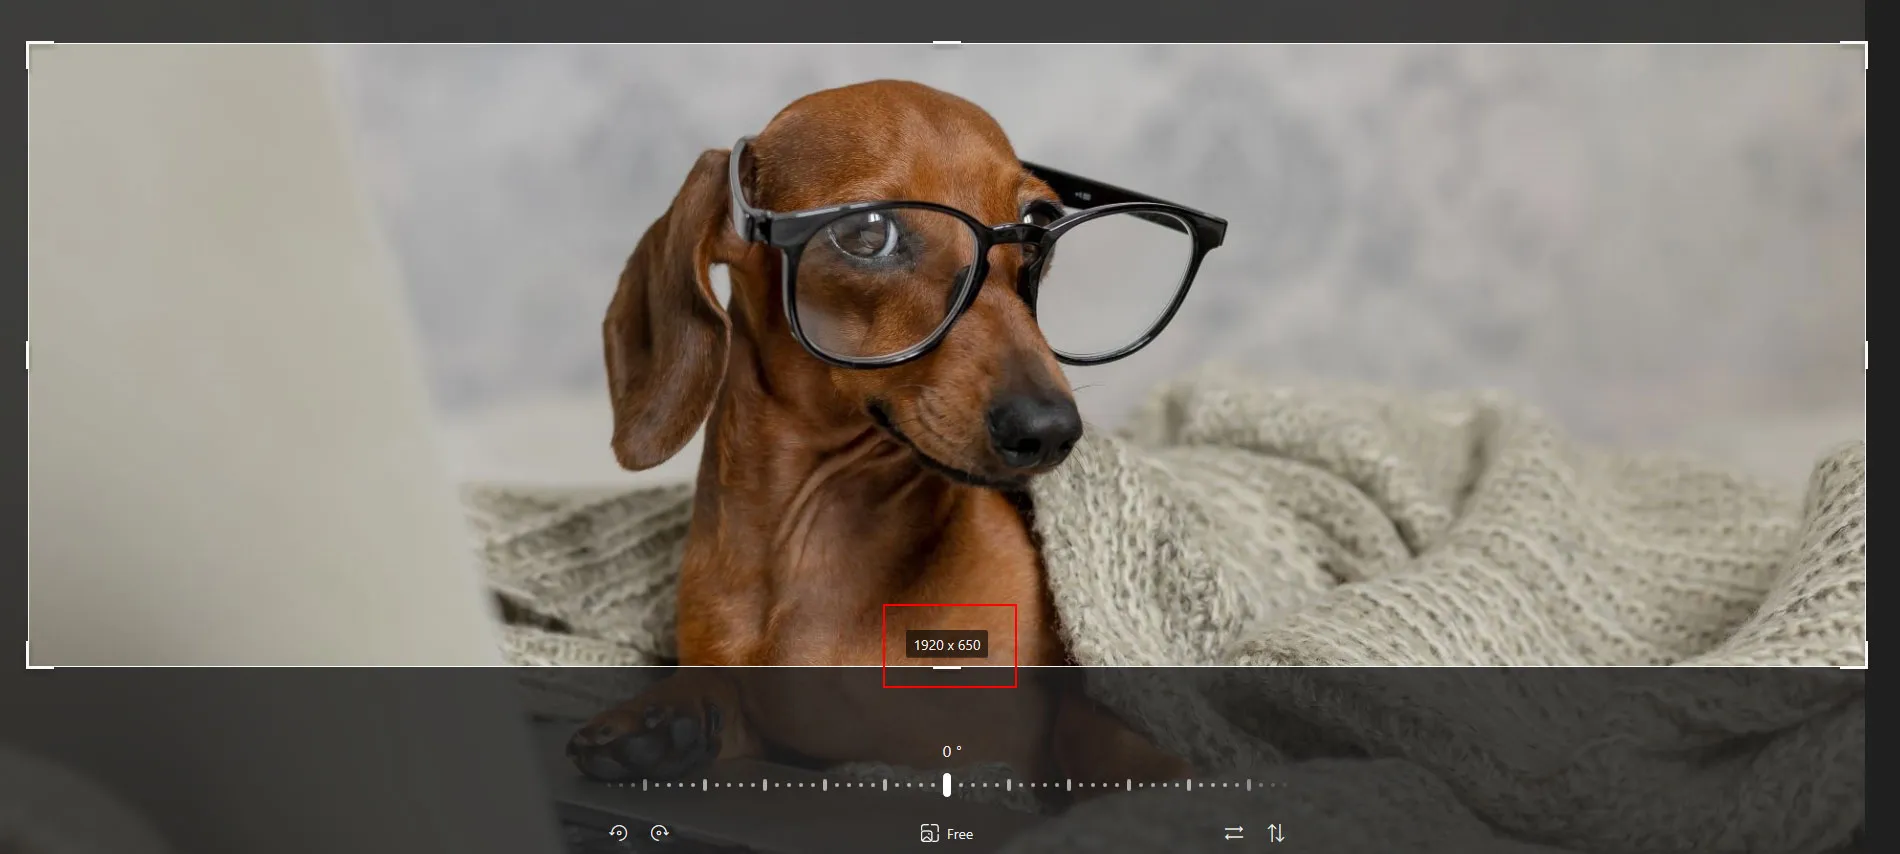
5. Adjust the position of the photo by dragging and dropping the highlighted area. You want to make sure the object in your photo is nicely centered.

6. Save your file. Select Save Options in the top right corner. Then choose:
You have successfully cropped your image. Here’s the result:


1. First locate your file on your Mac and double click, this should open up the program Preview.
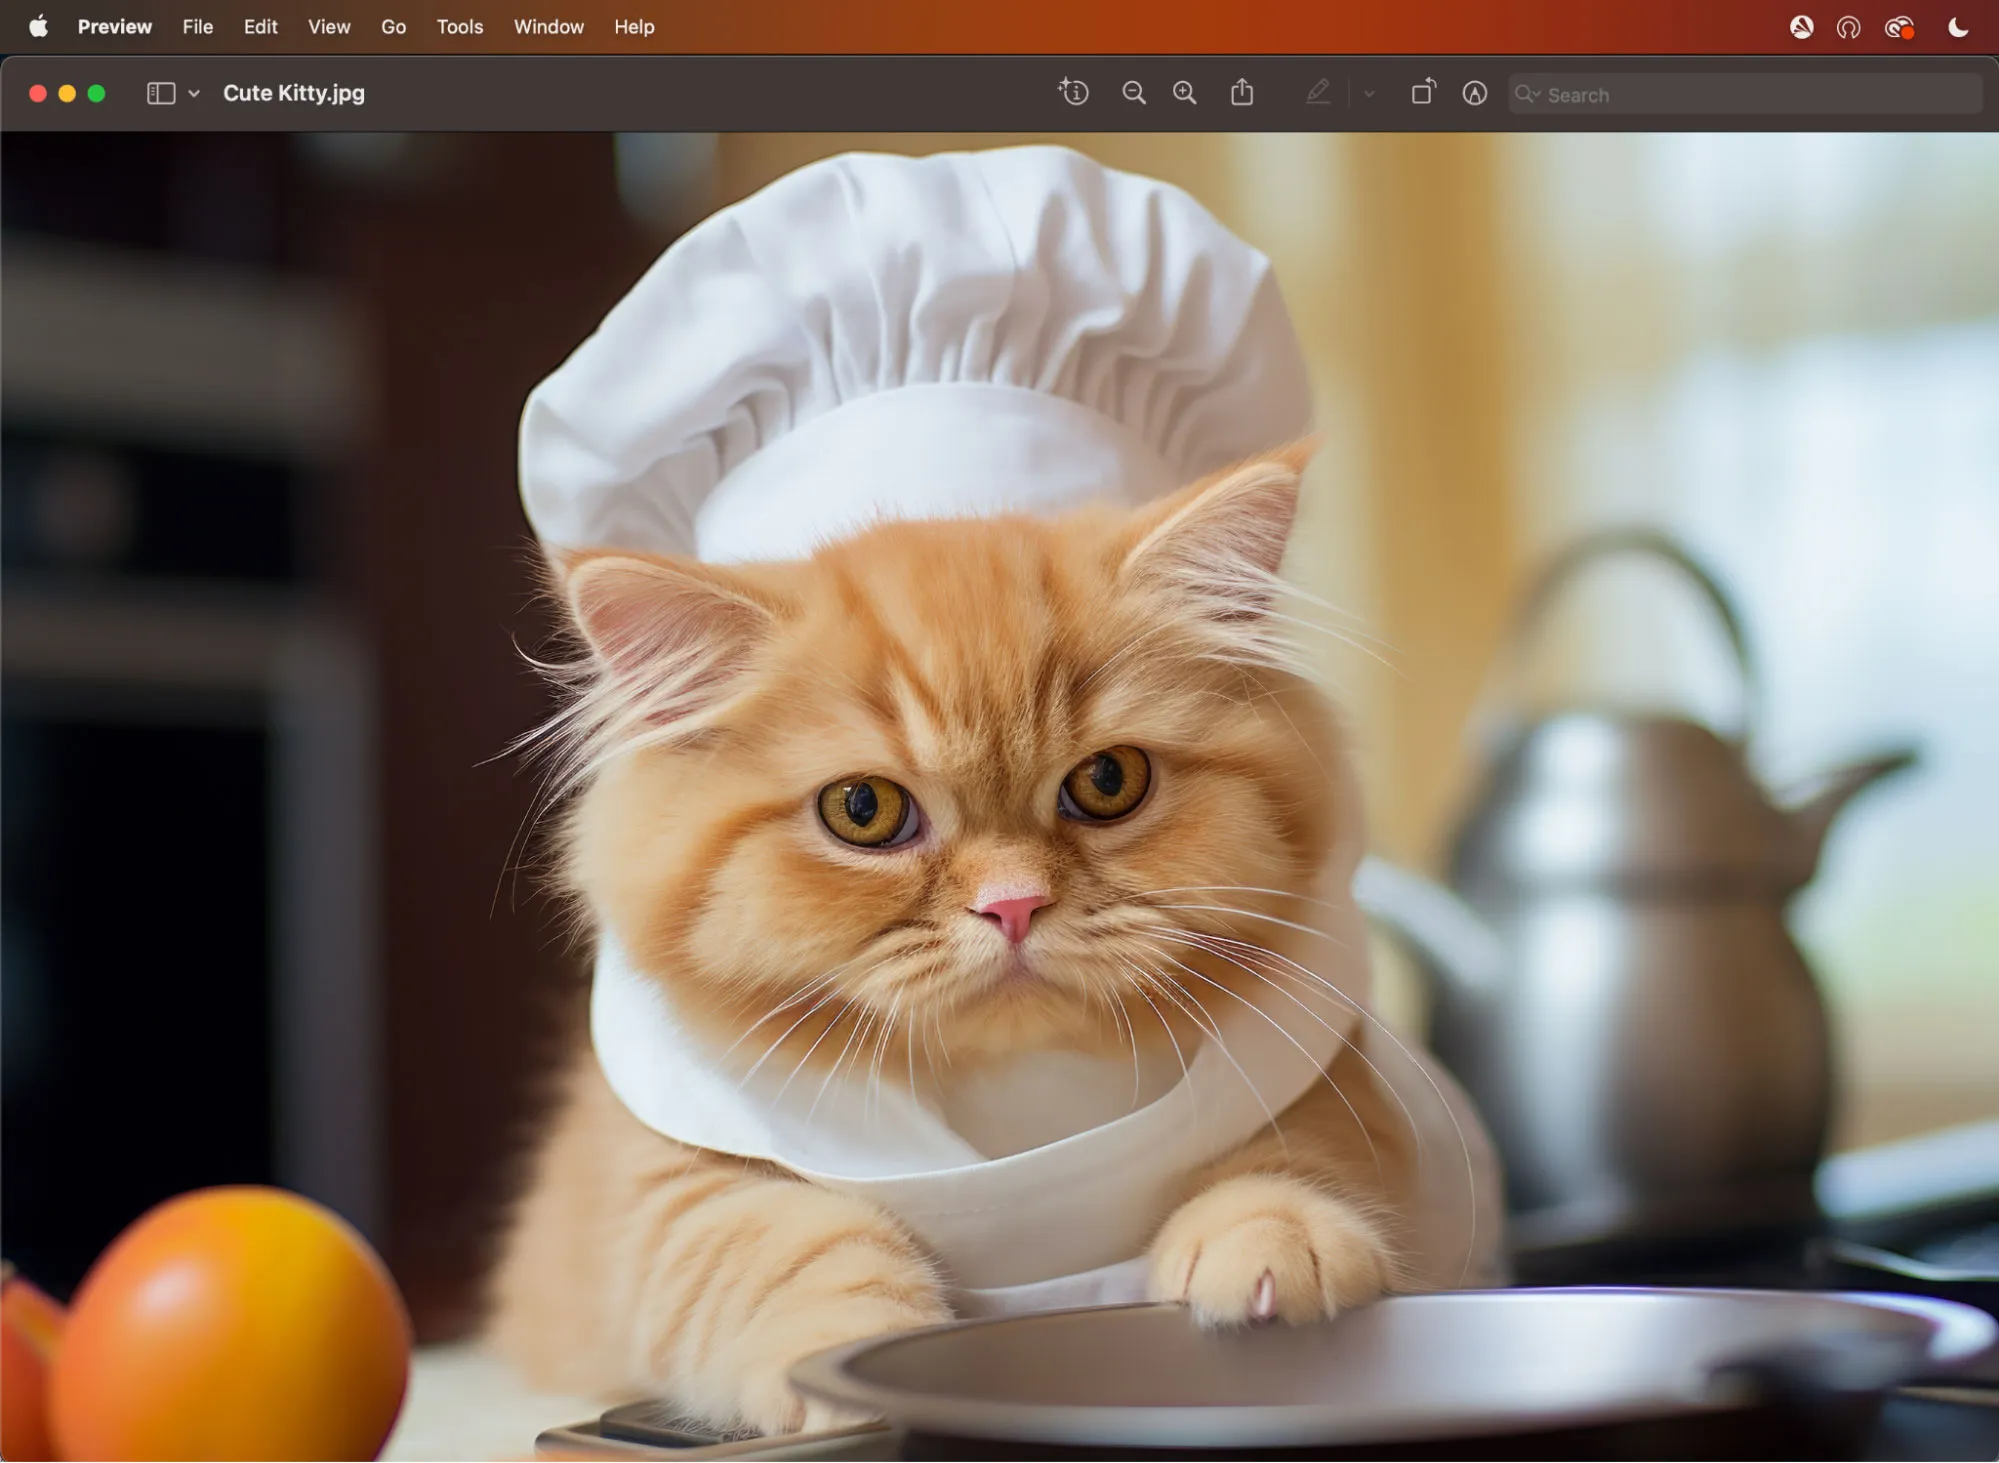
2. You will then be able to view the image. There are multiple options you can do with this straight away on Preview, such as rotating the image, highlighting, and annotating.
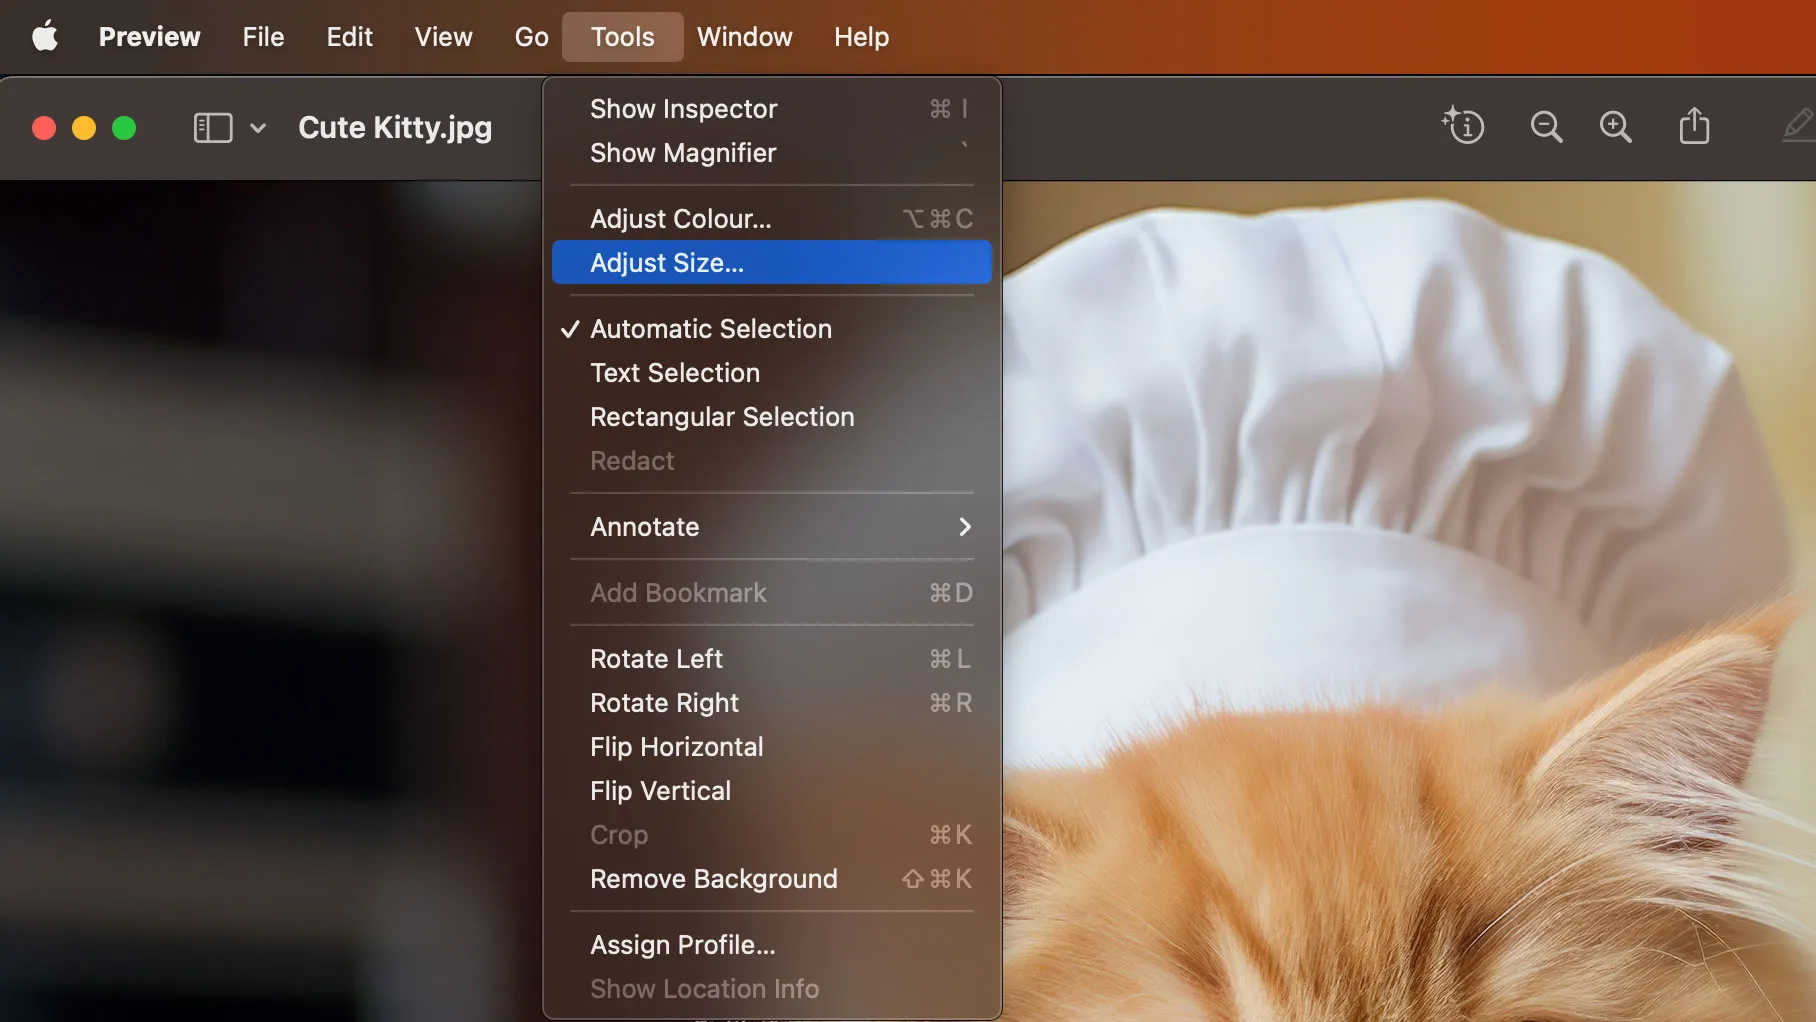
3. If your image is too large, you may want to shrink it down. This is fairly common, especially if you intend to upload the image to your website. Downsizing images for websites is essential for improving loading times, conserving bandwidth, and enhancing user experience, particularly on mobile devices. It also contributes to better search engine rankings and accessibility, making websites more efficient and inclusive.
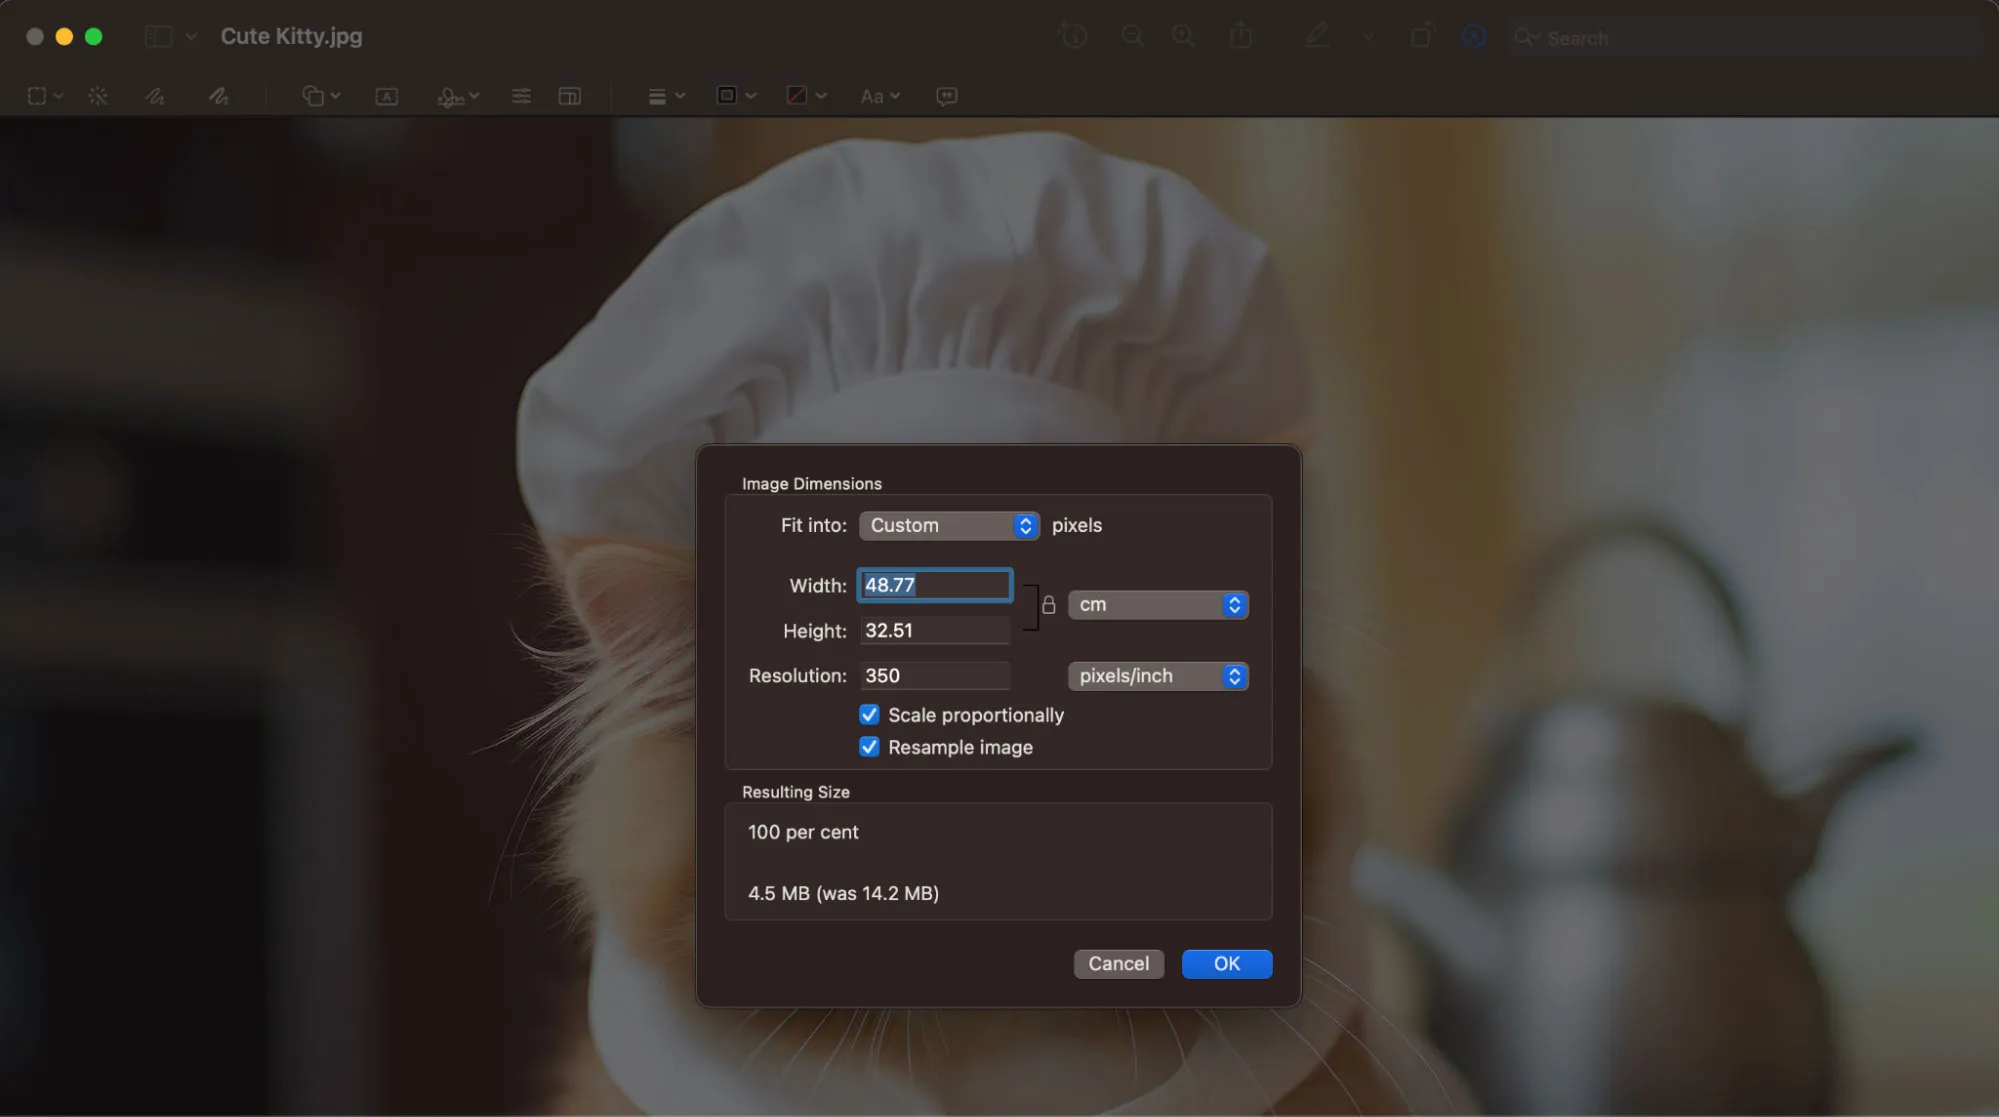
4. You will then see the current size and dimensions of your image. There are multiple options to choose the measurement unit you would like to edit. Here, it is showing CM. Depending on your intended use for the image, it is recommended to use Pixels for websites and MM or CM for print.
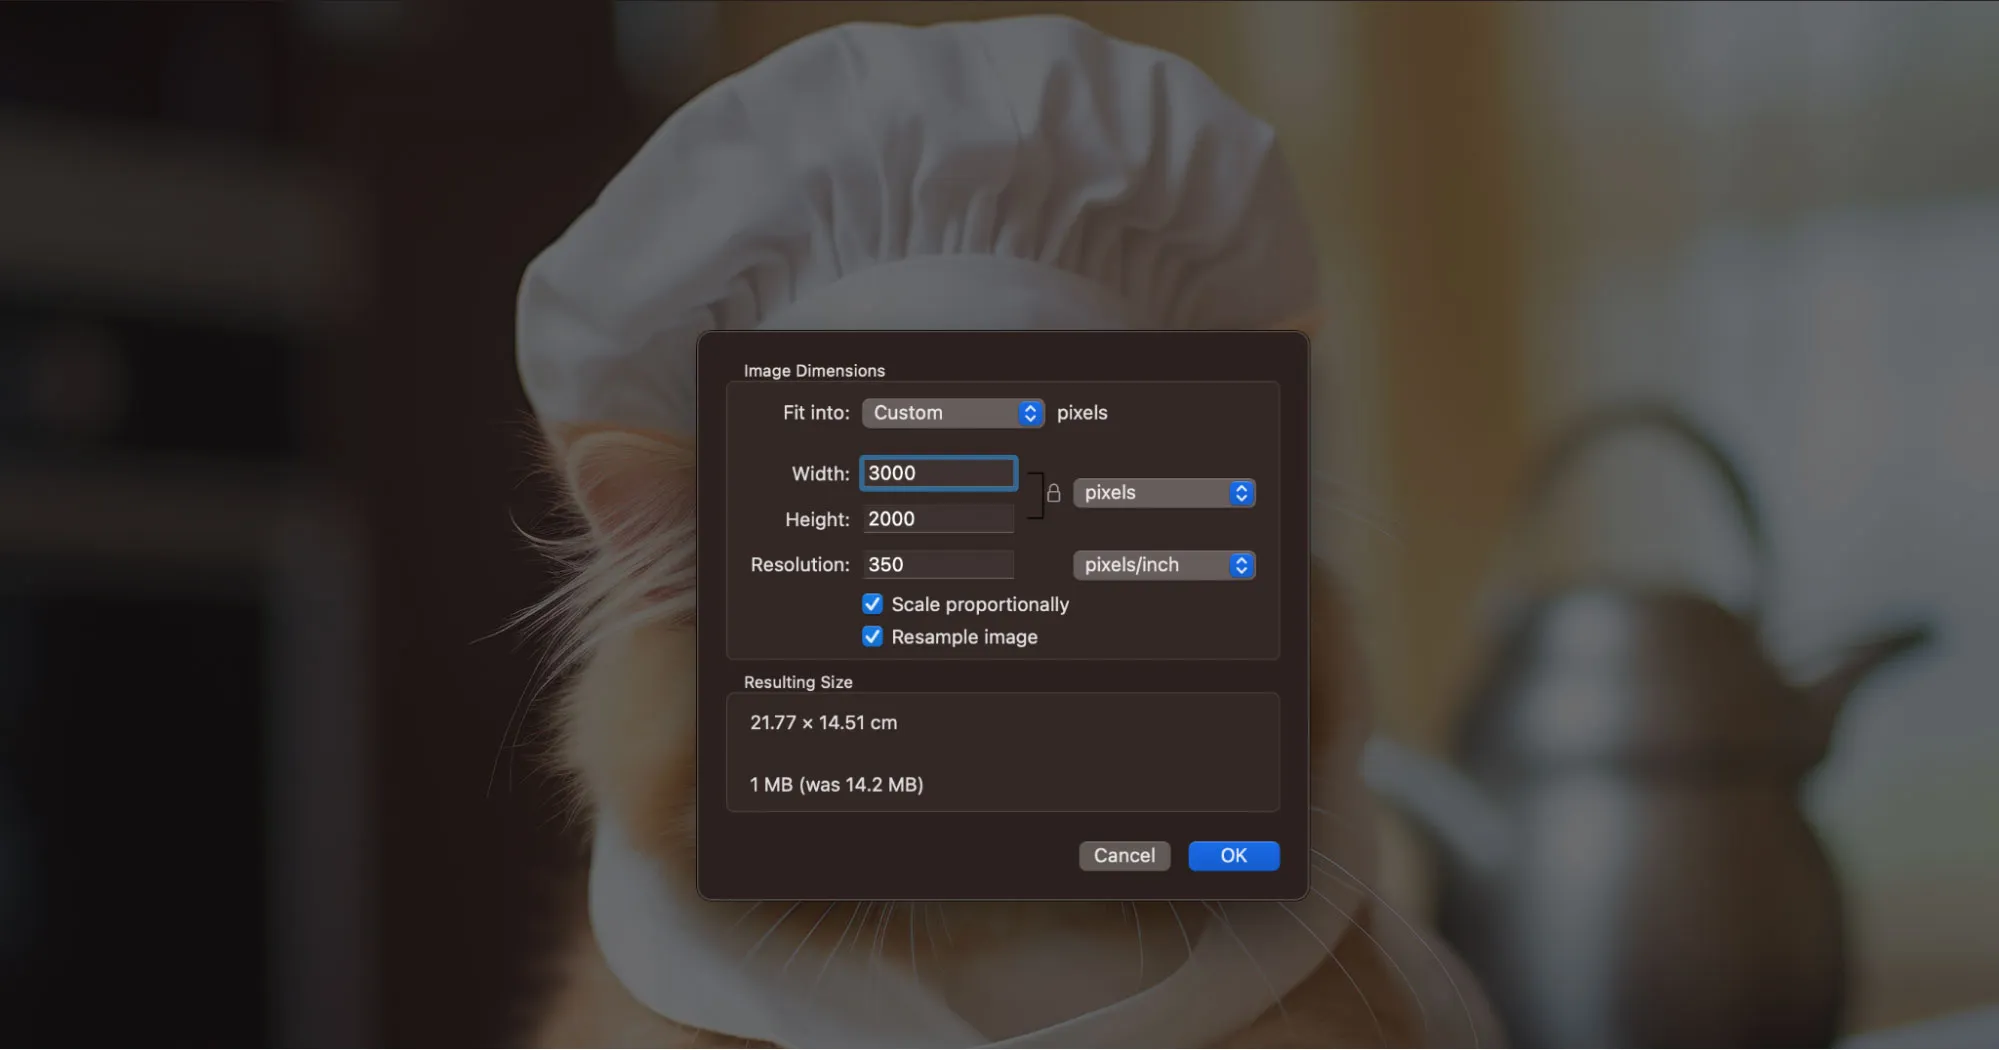
5. We have decided to halve the size of this image, and to keep things simple, we made sure the little lock next to ‘pixel’ is locked. This means that the image maintains the correct aspect ratio (shape), ensuring it does not look distorted. Then, press OK.
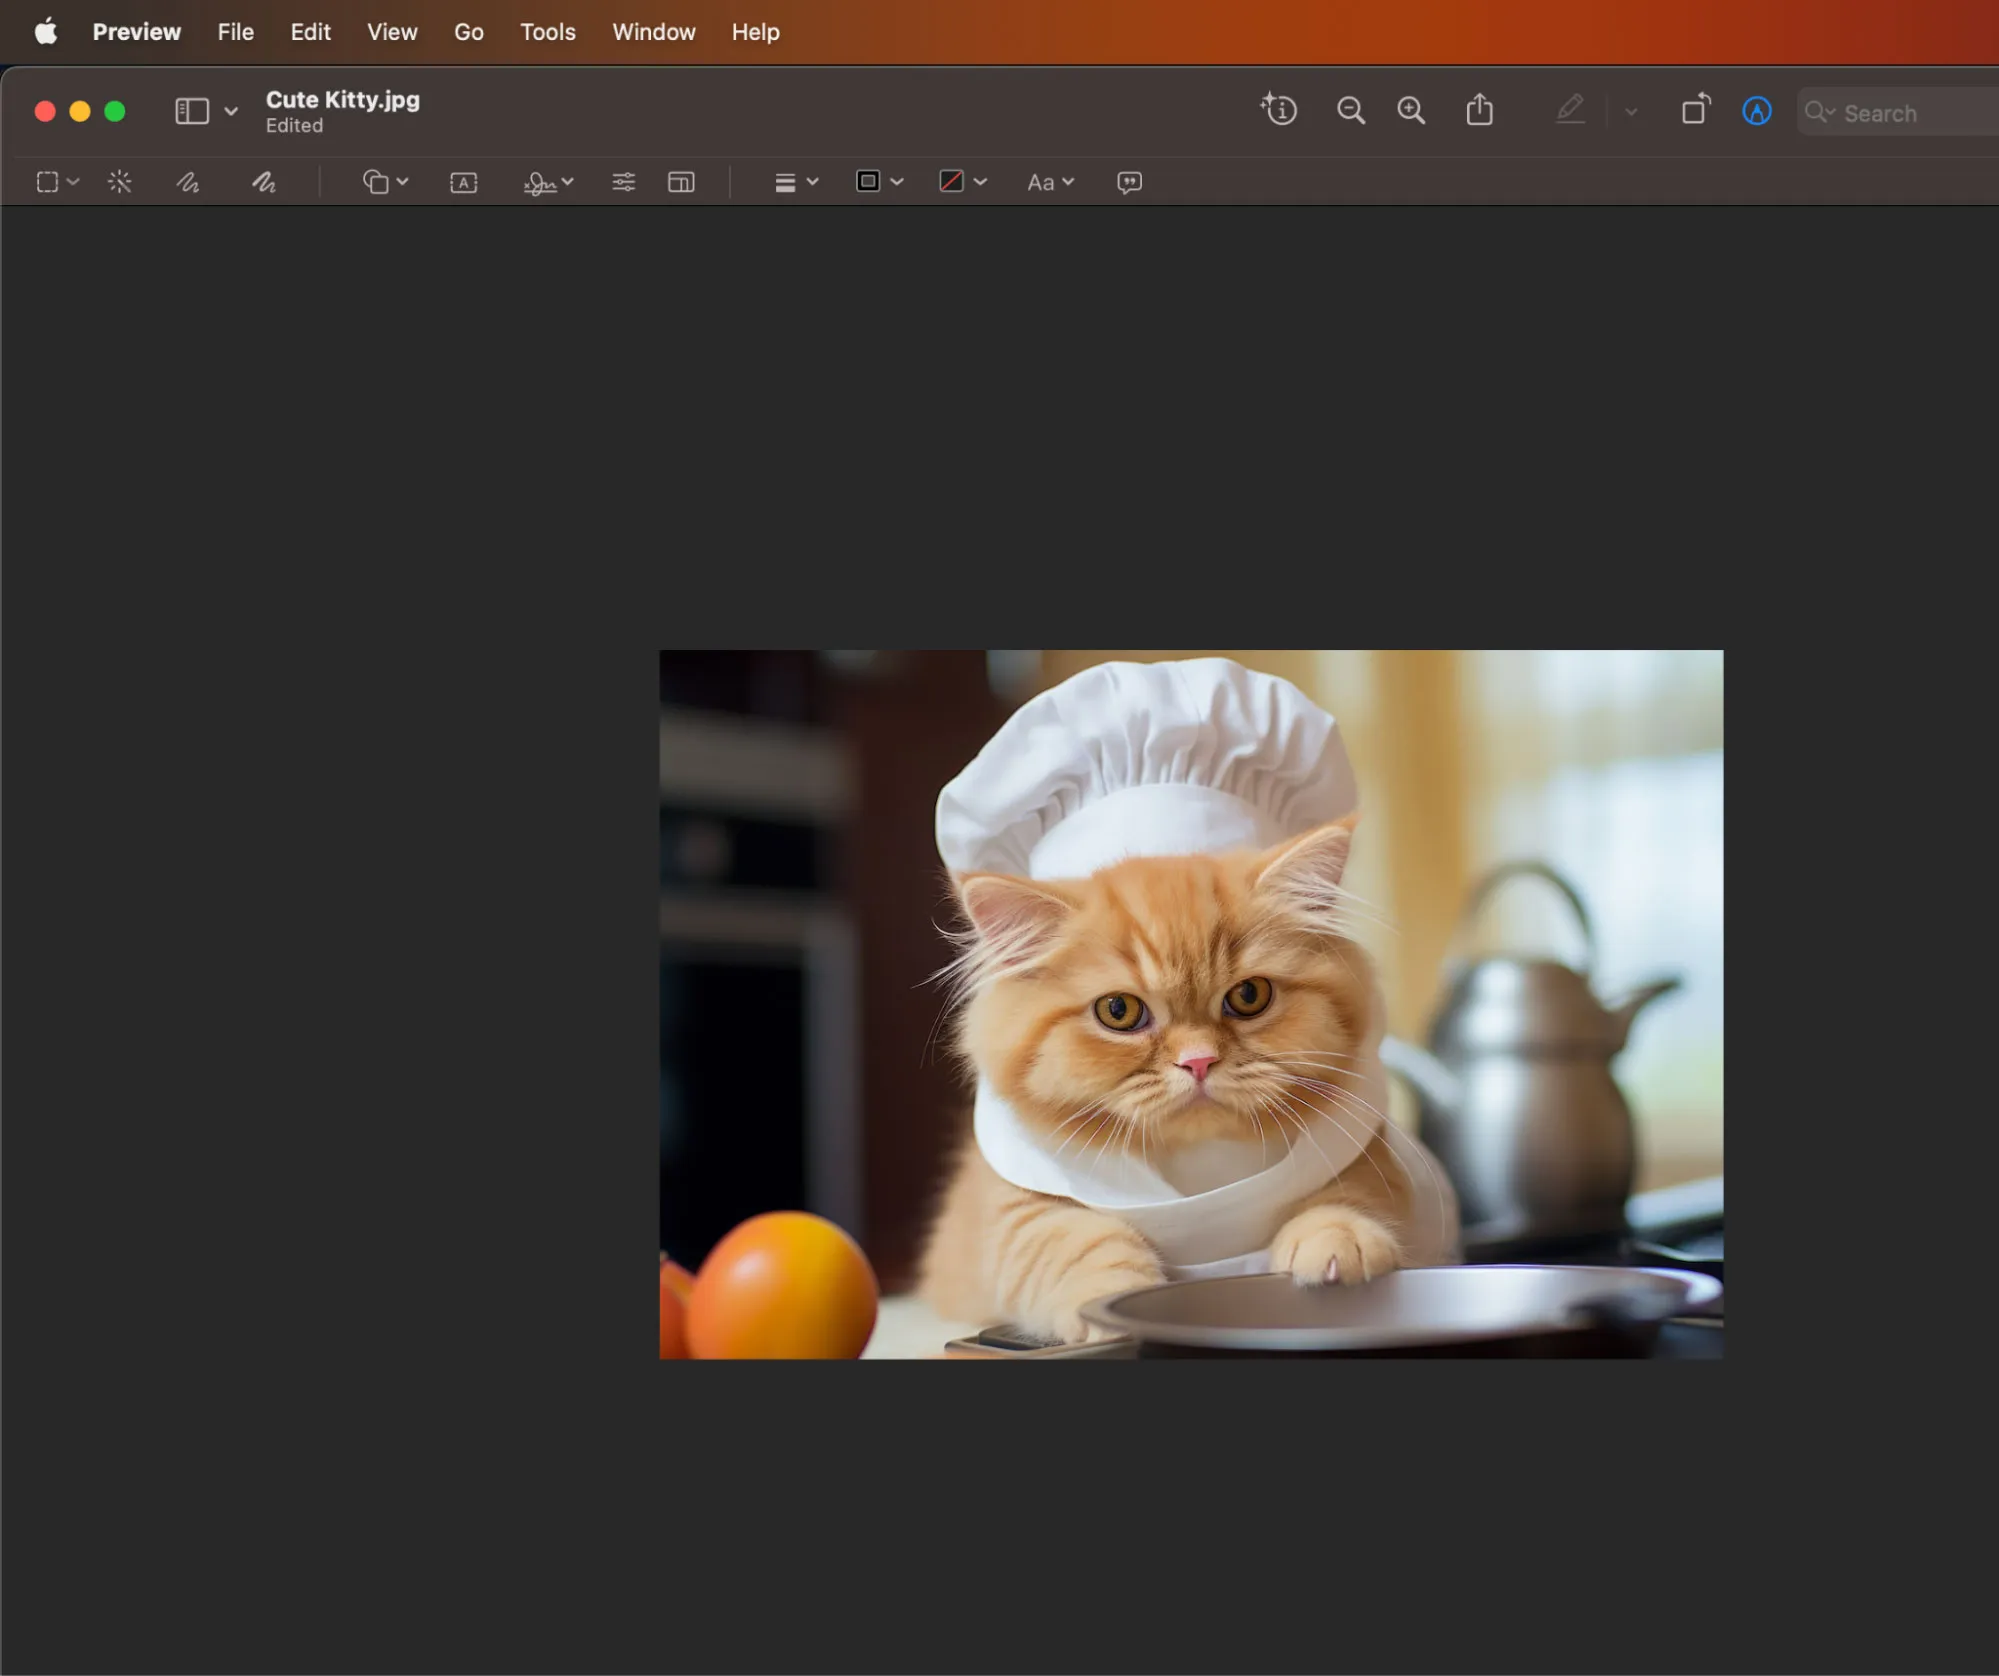
6. We can see that the image has now been edited because below the image name on the top left side, it will now say ‘Edited’. Ensure you are now happy with this size. In this instance, we managed to reduce the size of the file from 14MB to 1MB, a significant decrease in size. This reduction is crucial for websites to ensure good site speed.
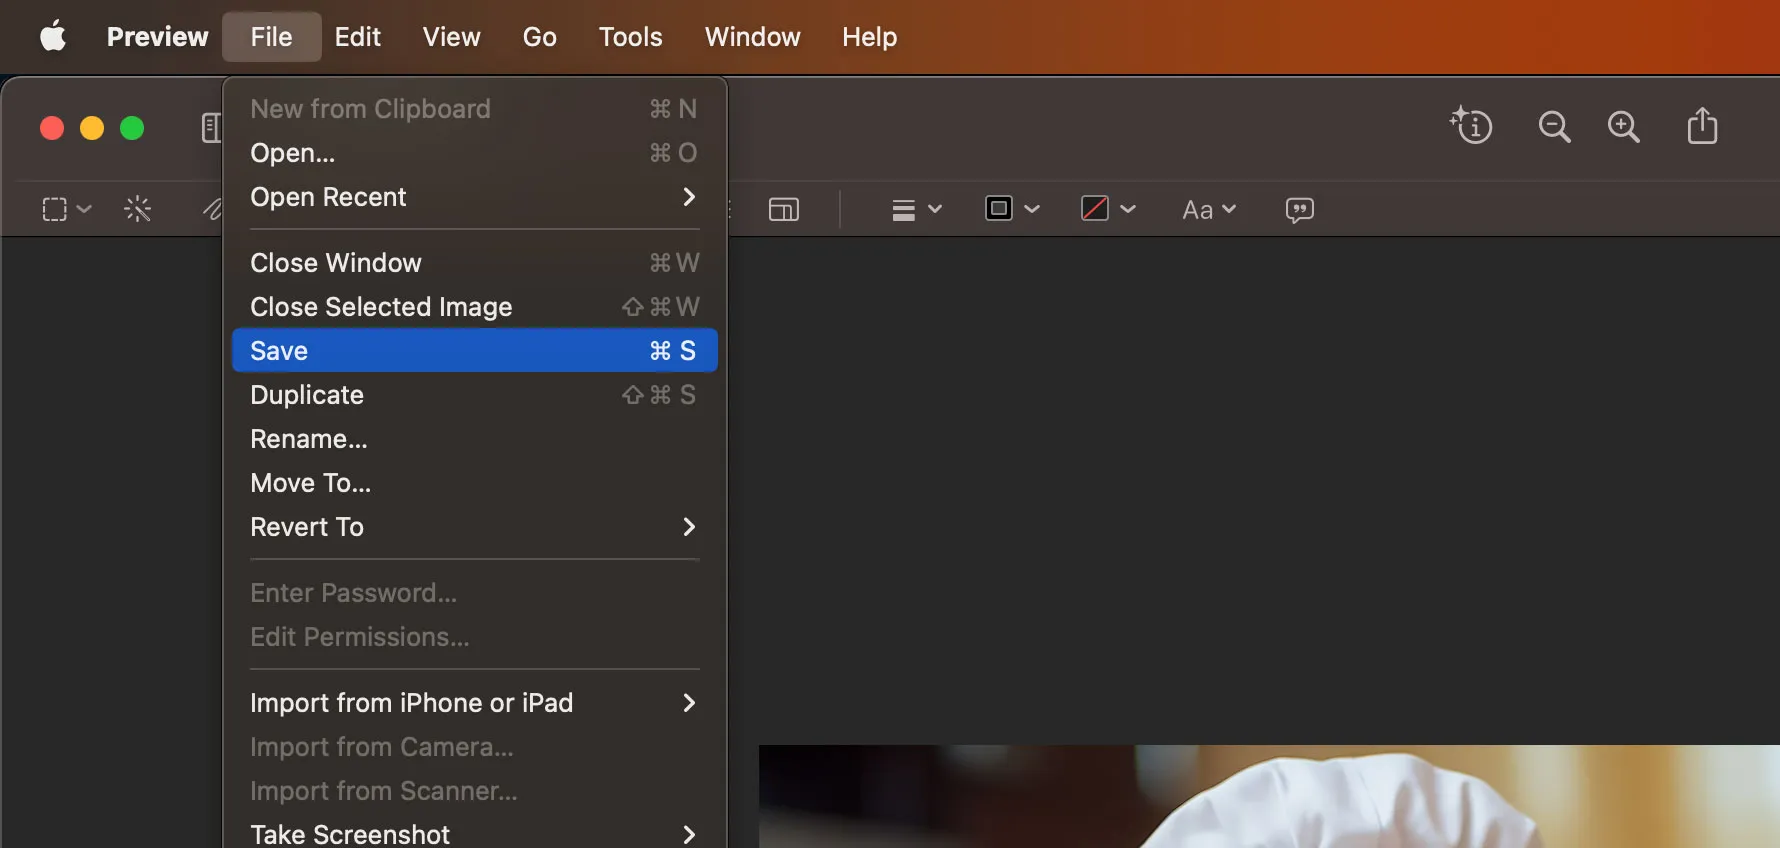
7. Now it is time to save the file. To do this, you must click ‘File’ and scroll down to ‘Save‘. Please note, if you want to retain the original file, you must Duplicate it and then save. If you simply save, you will overwrite the higher resolution file, which is something we recommend you avoid in case you wish to use it later on.
As you can see, resizing and cropping the images is easily done and doesn’t require any advanced tools. It takes a bit of an effort initially, but I promise, once you do a couple of images, you’ll be editing them in no time.
The boost in page speed and load time is definitely worth the effort and time.
If after all this you decide that messing with the photo editing isn’t for you, feel free to reach out to us. Whether it’s once off or you decide to purchase an ongoing support contract – we’re always happy to help with your website maintenance.